
Realistic AI-assistant
Published:
Introduction
This project presents an AI assistant built on the Arduino ecosystem and powered by the ESP32 platform, designed to interact naturally with humans through spoken conversation. The system combines embedded artificial intelligence with expressive hardware, featuring animatronic eyes for non-verbal feedback and an LCD screen that functions as a dynamic, animated mouth.
To enhance realism and efficiency, the assistant supports an autonomous “sleep” state. When inactive, it enters a low-interaction mode and passively monitors audio input for predefined wake words. Upon detection, the system seamlessly transitions back to an active conversational state, creating a more lifelike and intuitive user experience.
By integrating real-time speech processing, state-aware behavior, and physical expression within a resource-constrained embedded platform, this project demonstrates how accessible microcontroller frameworks can be used to build engaging, interactive AI systems that bridge the gap between software intelligence and physical embodiment.
Drawing inspiration from the Alexatron by Thomas Burns, I plan to build a robot that utilizes a self-configured AI assistant rather than a pre-integrated Echo device.
Components for this project
AI assistant components
- ESP32-S3-N16R8
- MAX98357A Audio Amplifier
- INMP441 Micro Module
- 4Ω3W Speaker
Animatronic eyes components
- Arduino Uno R3
- PCA9685A Adafruit 16-Channel 12-bit PWM/Servo Driver
- LCM1602 package (including LCD screen + I2C bus attached)
- 3D-printed Animatronic Eyes (printing files here)
Power components
- 12V5A DC to AC Adapter
- 2x XL4015 DC to DC Buck Converter
- Male DC Barrel Jack Adapter
Extras
- M3, M2 screws
- Wires
- Soldering equipment
Technical Overview
AI Assistant
Instead of using an Echo device, I leveraged DAZI-AI, an AI assistant platform that is highly customizable for my specific uses.
Technically, the platform operates through a three-stage pipeline: Speech-to-Text (STT), Language Processing, and Text-to-Speech (TTS). The system shifted from standard HTTP protocols to WebSockets, which enable real-time audio streaming. This shift significantly reduces latency, moving away from “push-to-talk” mechanics toward a more natural, fluid conversation flow. The integration of Voice Activity Detection allows the ESP32 to intelligently sense when a user has started or finished speaking, thereby automating the recording and transmission process.
On the hardware side, the architecture leverages the ESP32-S3’s high-speed processing and dual-core capabilities to manage simultaneous tasks like I2S audio sampling and Wi-Fi data transmission. It typically utilizes a MEMS microphone (like the INMP441) for audio input and an I2S DAC/Amplifier (like the MAX98357) for speaker output.
Moreover, the software is highly customizable through “System Prompts,” which allow developers to hardcode specific personalities or roles directly into the AI’s logic—making it an ideal “brain” for a custom robot that needs to behave in a specific way, such as a language tutor or a personalized assistant.
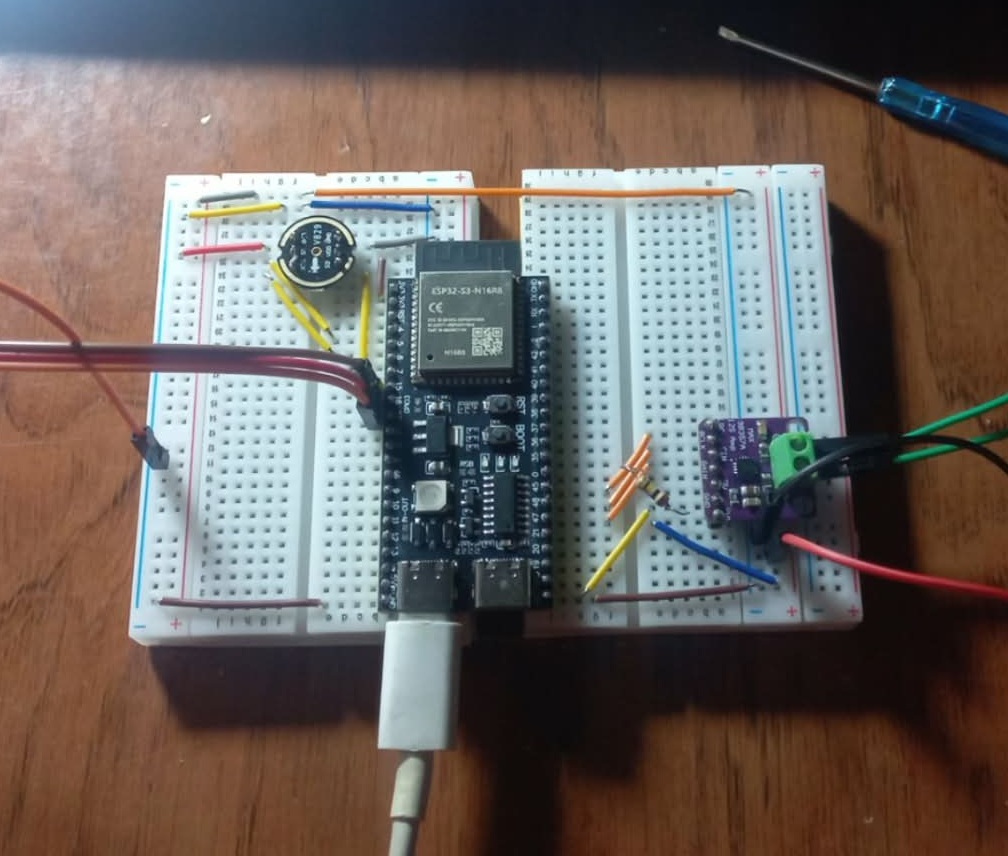
Electric circuit of the AI Assistant system.
Animatronic eyes and LCD mouth
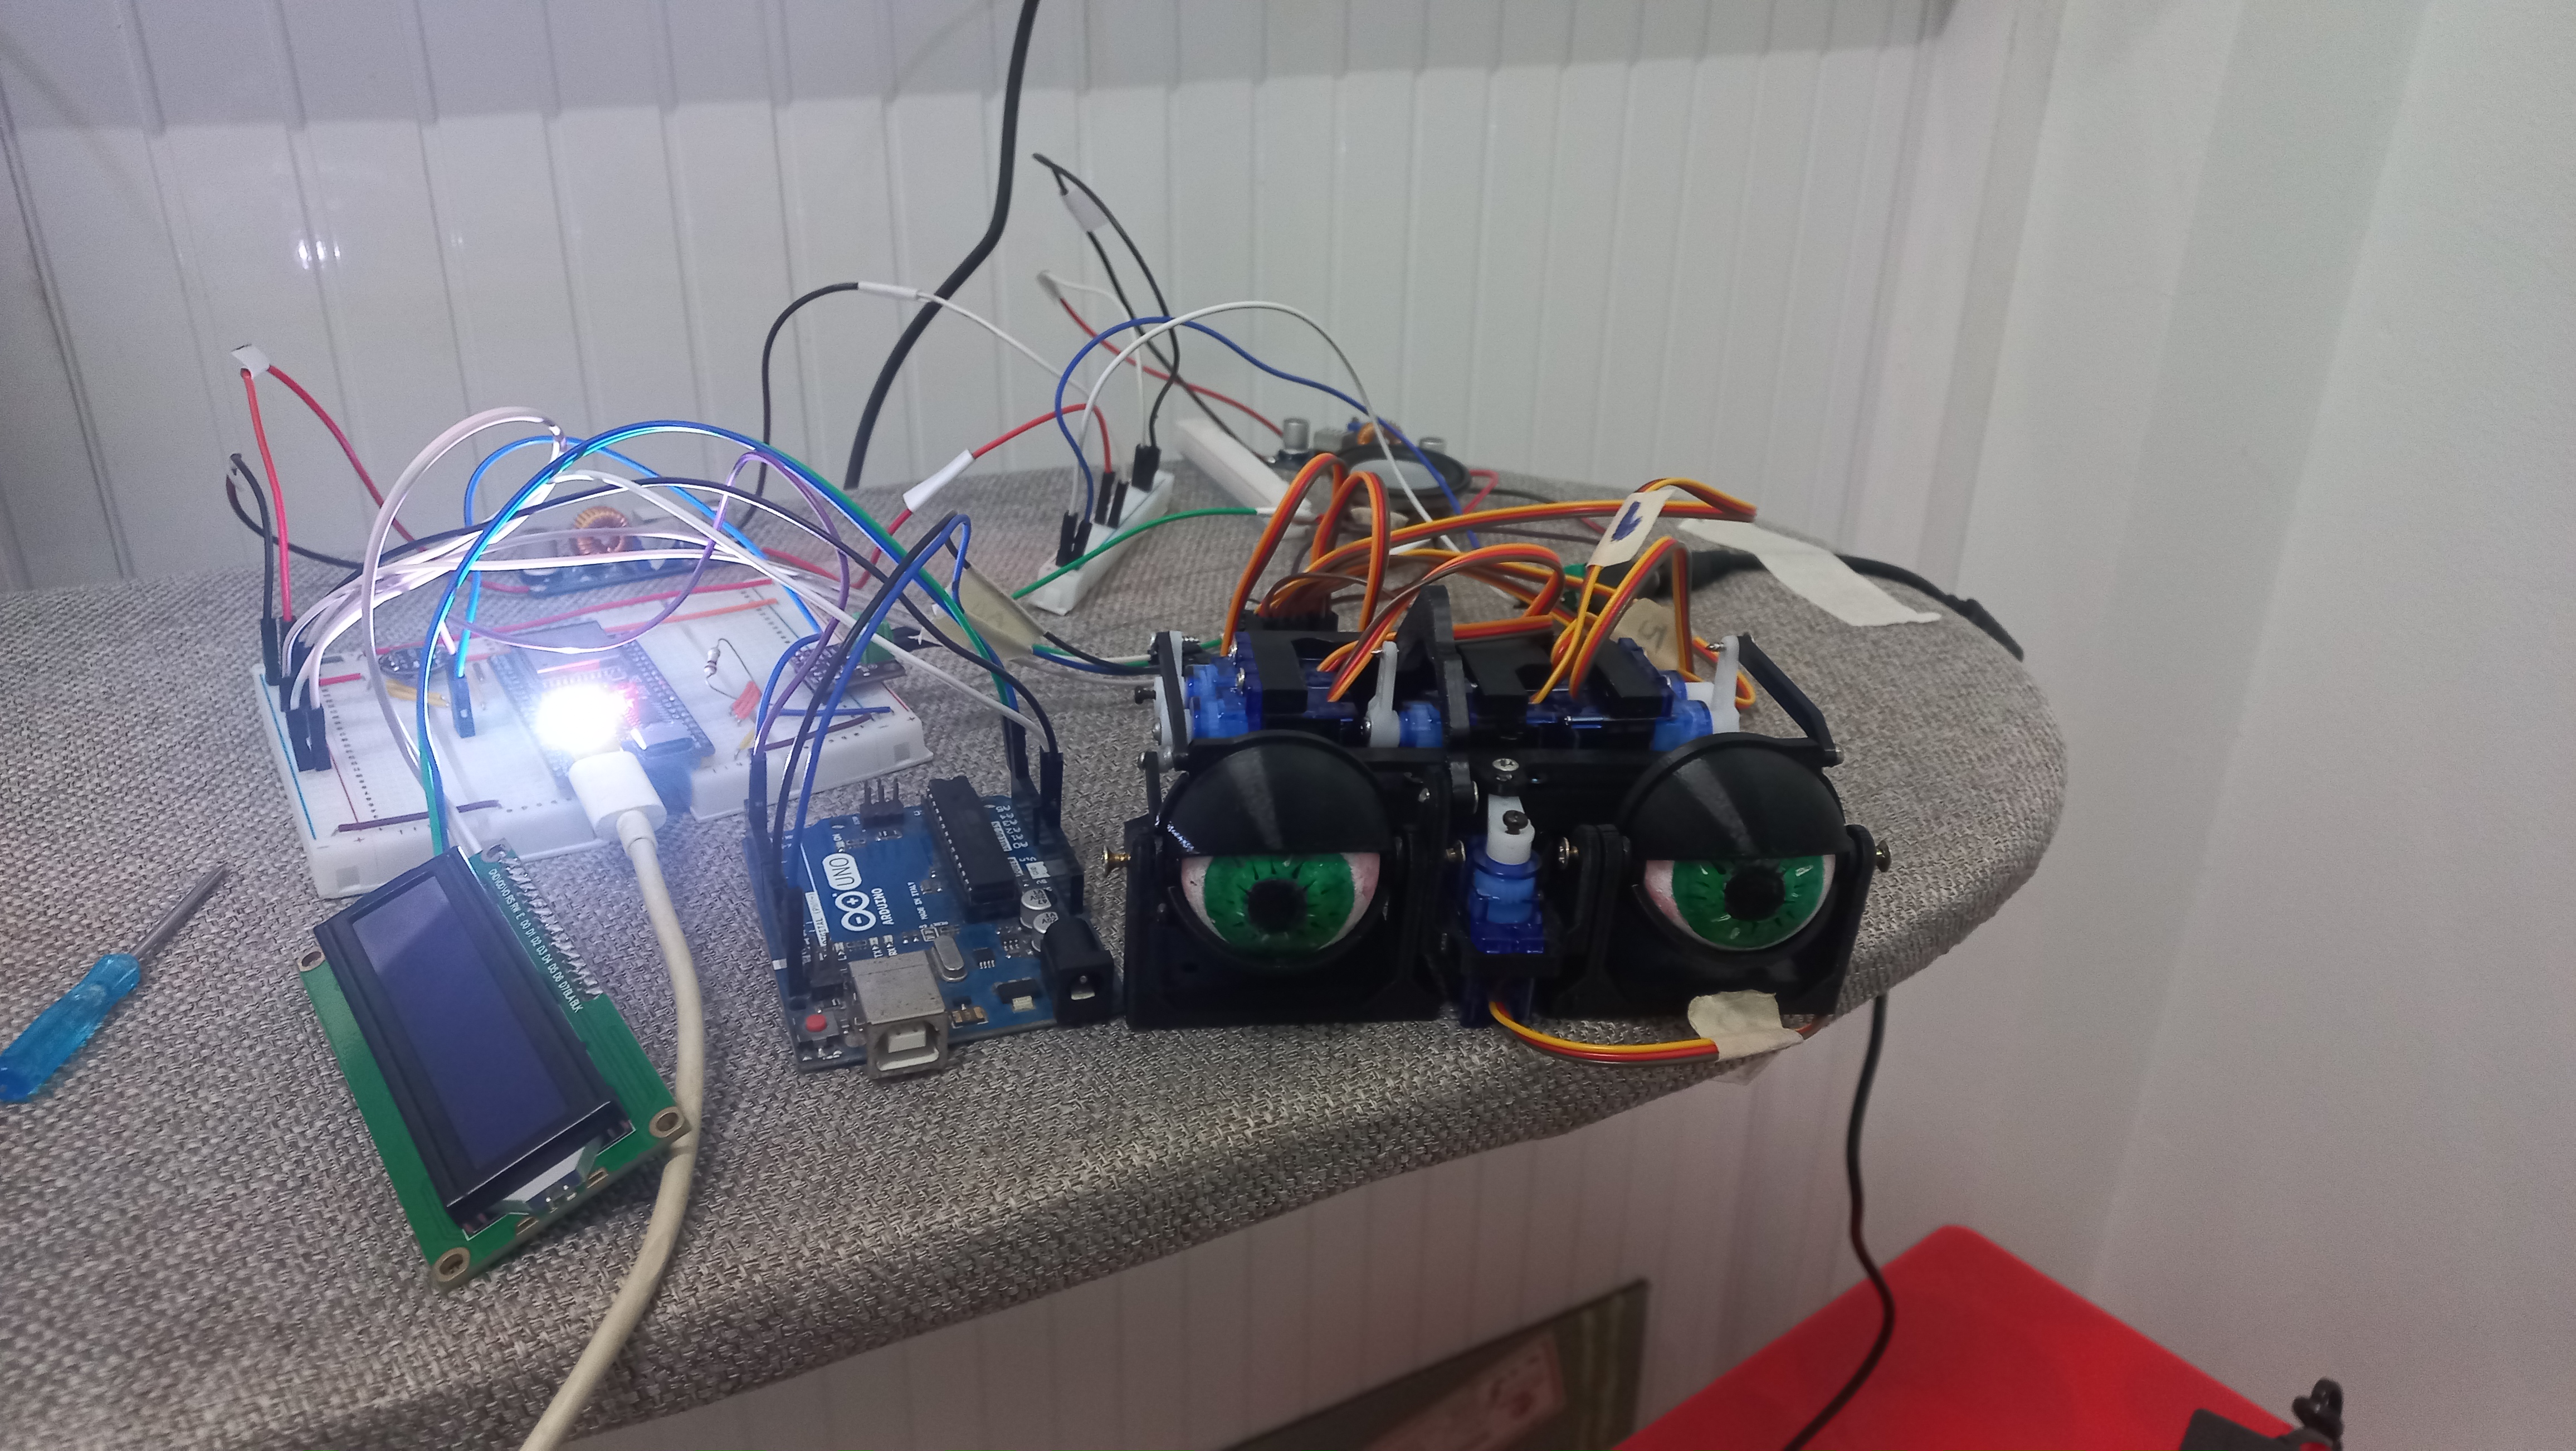
A key element in humanizing the robotic assistant is the inclusion of a 3D-printed animatronic eye mechanism. Based on the open-source designs by Will Cogley, this mechanism provides a robust yet simple solution for realistic gaze and blinking. The motion control system is powered by an Arduino, utilizing an Adafruit 16-channel 12-bit PWM/Servo Driver to ensure smooth, precise servo transitions, allowing the robot to establish more engaging contact with the user.
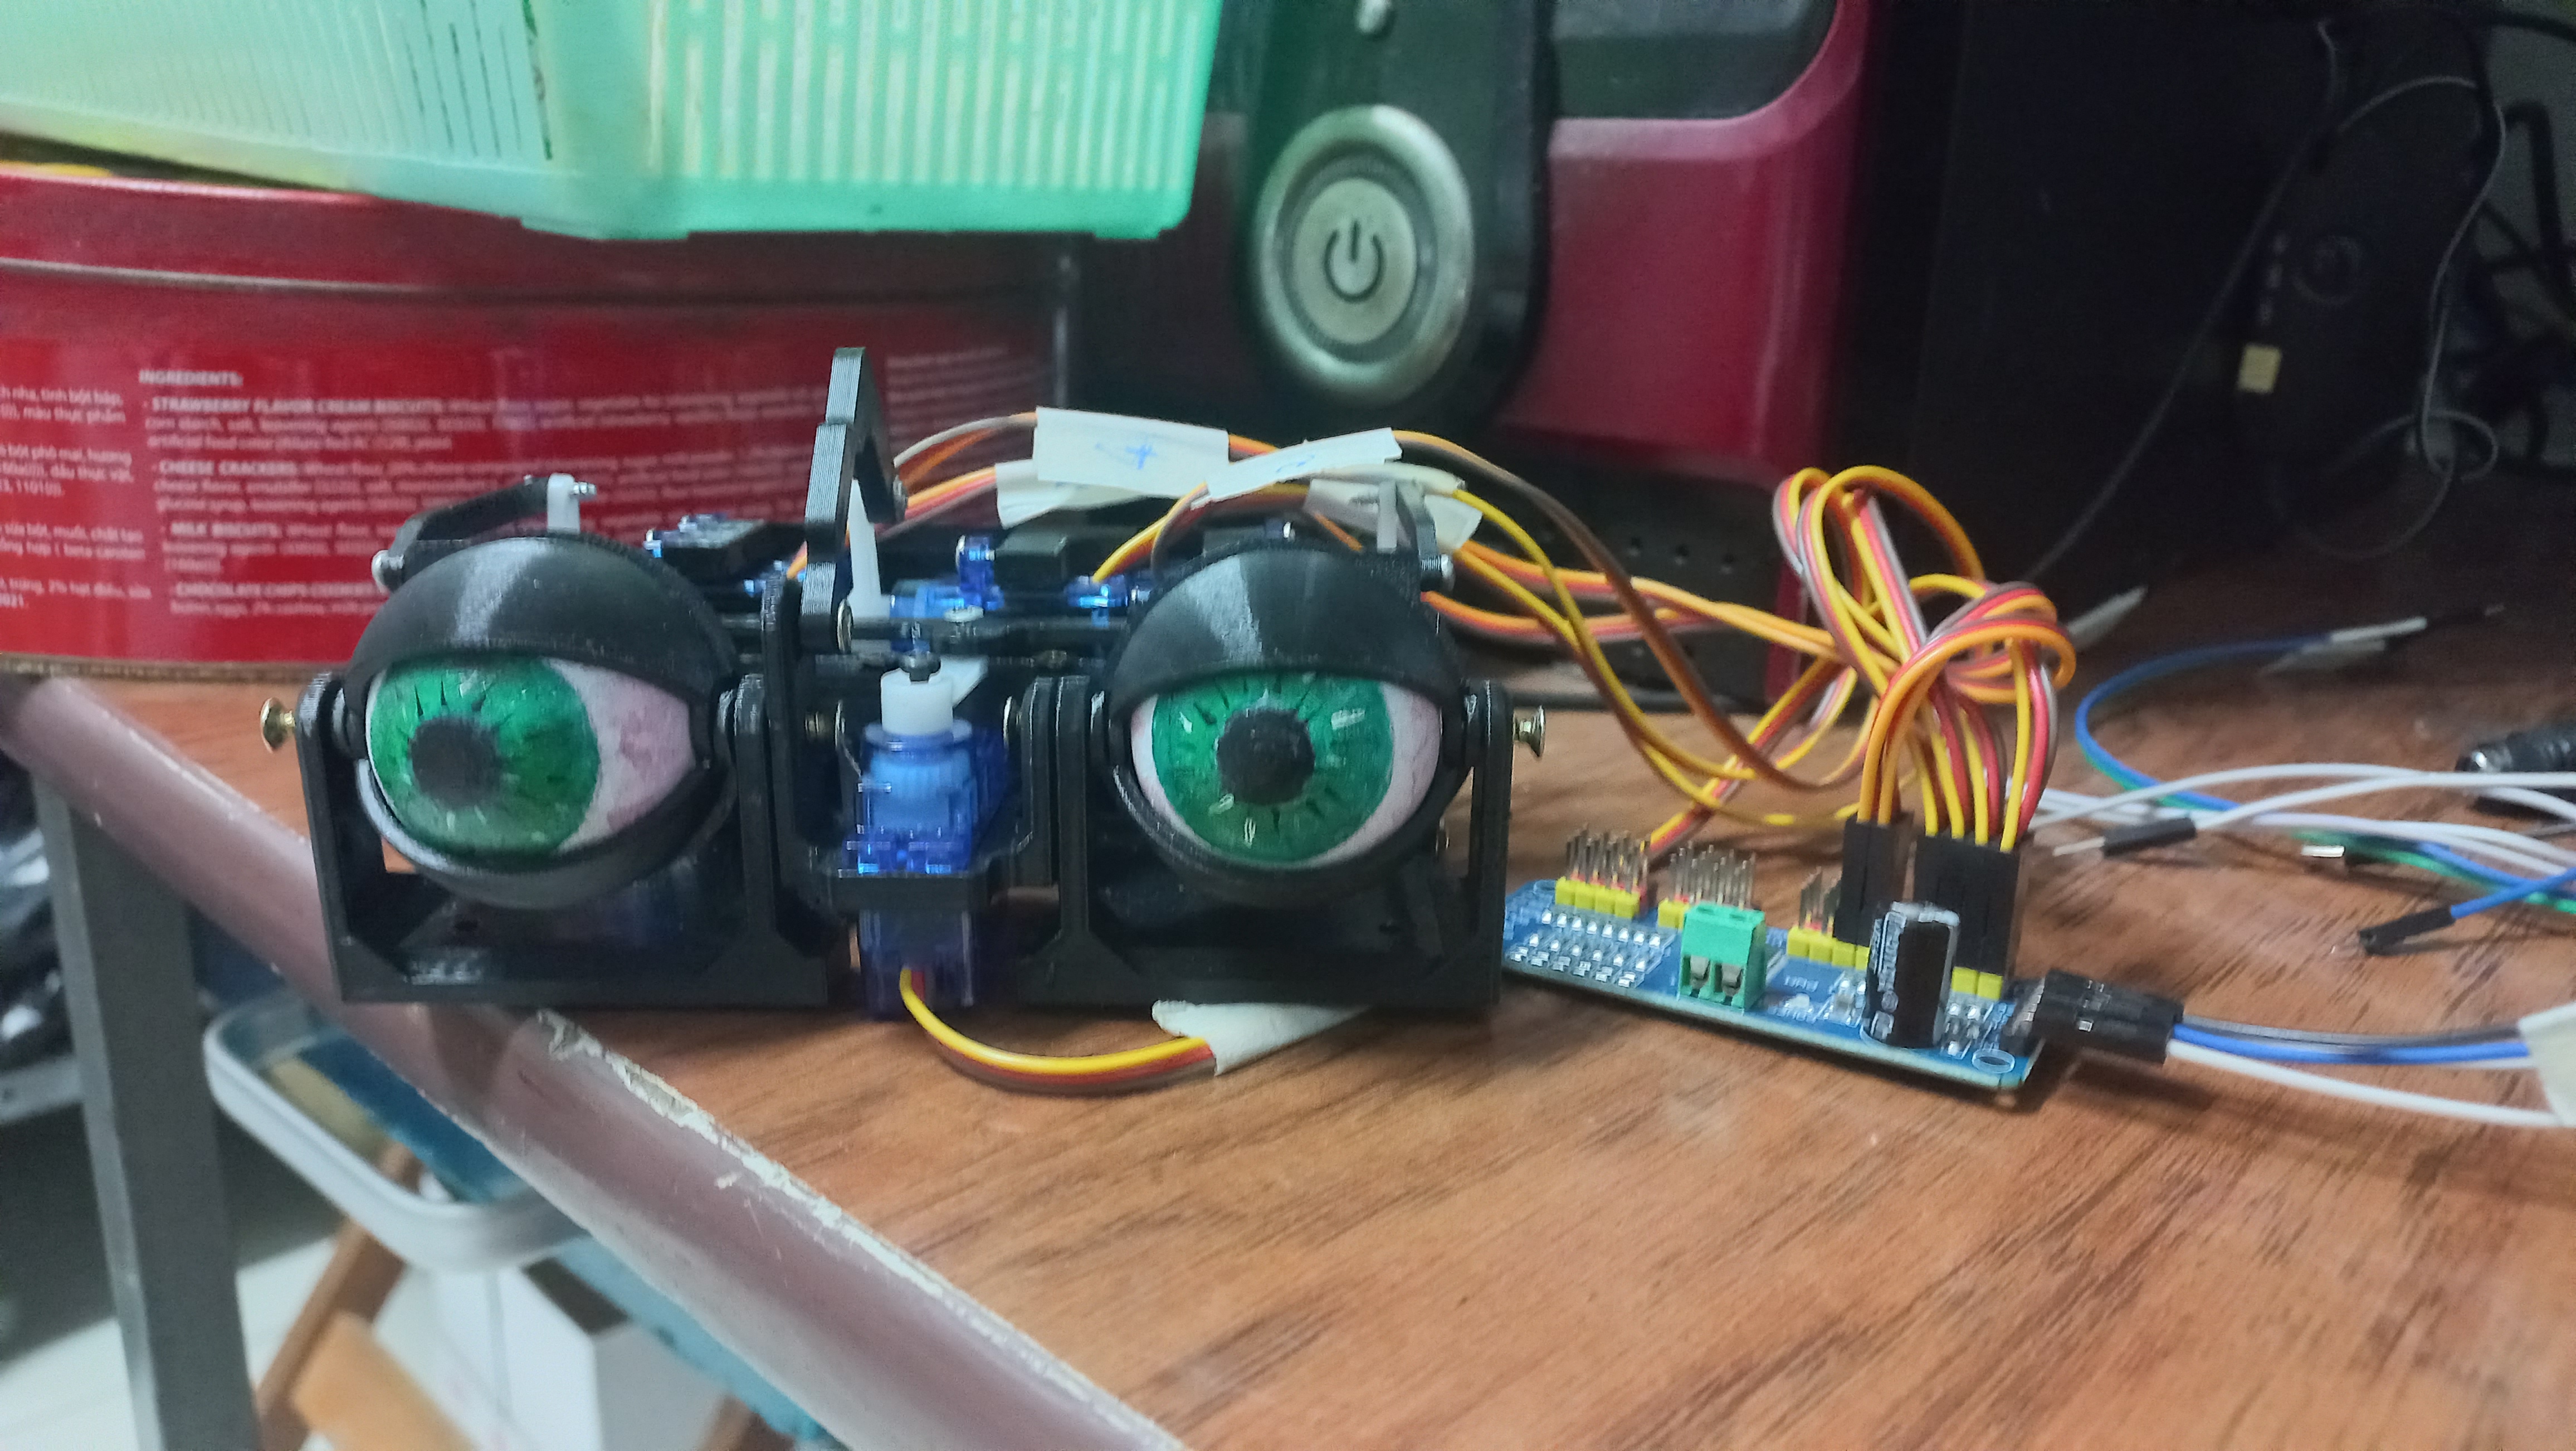
Animatronic eyes connected to Adafruit Servo Driver.
To give the robot a more friendly appearance, I also included an LCD mouth using the LCM1602 package, which features I2C support for easy implementation. Since the module’s internal ROM lacked appropriate mouth shapes, I developed custom 5x8 pixel glyphs to represent different mouth states. By alternating between these custom characters during audio playback, a basic lip-syncing effect was achieved. Final calibration involved manually tuning the onboard potentiometer on the I2C backpack to optimize the contrast ratio for maximum legibility.
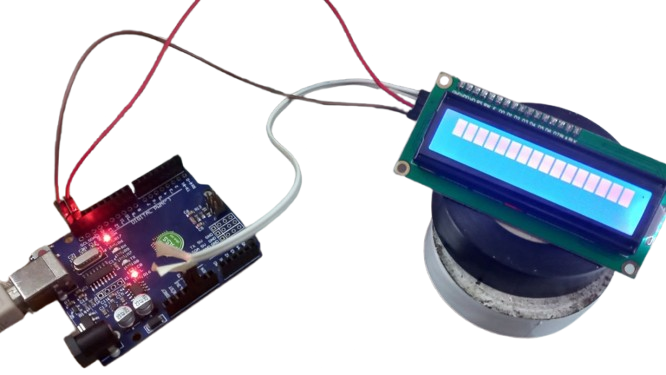
Untuned LCD screen not being able to display characters clearly.
Wake word
To facilitate natural user interaction, the system will passively listen for specific ‘wake phrases,’ such as ‘Hey, [Name],’ during the idle state. Upon successful detection of the trigger phrase, the assistant transitions from an idle state to a continuous conversation mode. During this active state, the system employs Automatic Speech Recognition (ASR) to maintain a seamless dialogue flow. If the system detects a prolonged period of silence exceeding a predefined timeout threshold, the robot executes a ‘fallback’ routine, returning to a low-power sleep state and physically closing its animatronic eyes.
Inter-board communication between the ESP32 and the Arduino Uno was implemented using a GPIO-based bit-signaling system to synchronize the robot’s state. Although the ESP32 operates on a 3.3V logic level, this voltage is sufficient to meet the Input High Voltage threshold for the Arduino Uno. This direct connection allowed for reliable signal detection without the need for a level shifter, while inherently protecting the ESP32 from overvoltage, as the signal remains within the safe operating limits of both devices.
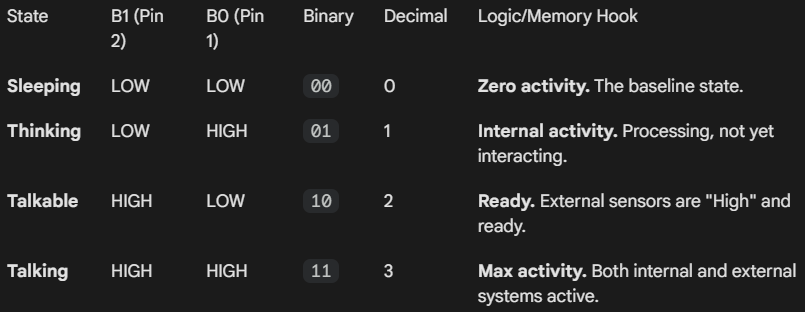
Bit logic for distinct states.
Assembly
The system was assembled in accordance with the schematics provided in the following section. To ensure structural integrity and improve the overall aesthetic of the robot, the internal components and circuitry were housed within a custom white enclosure. This integration not only conceals the complex wiring but also protects the sensitive electronics from external interference and physical damage.
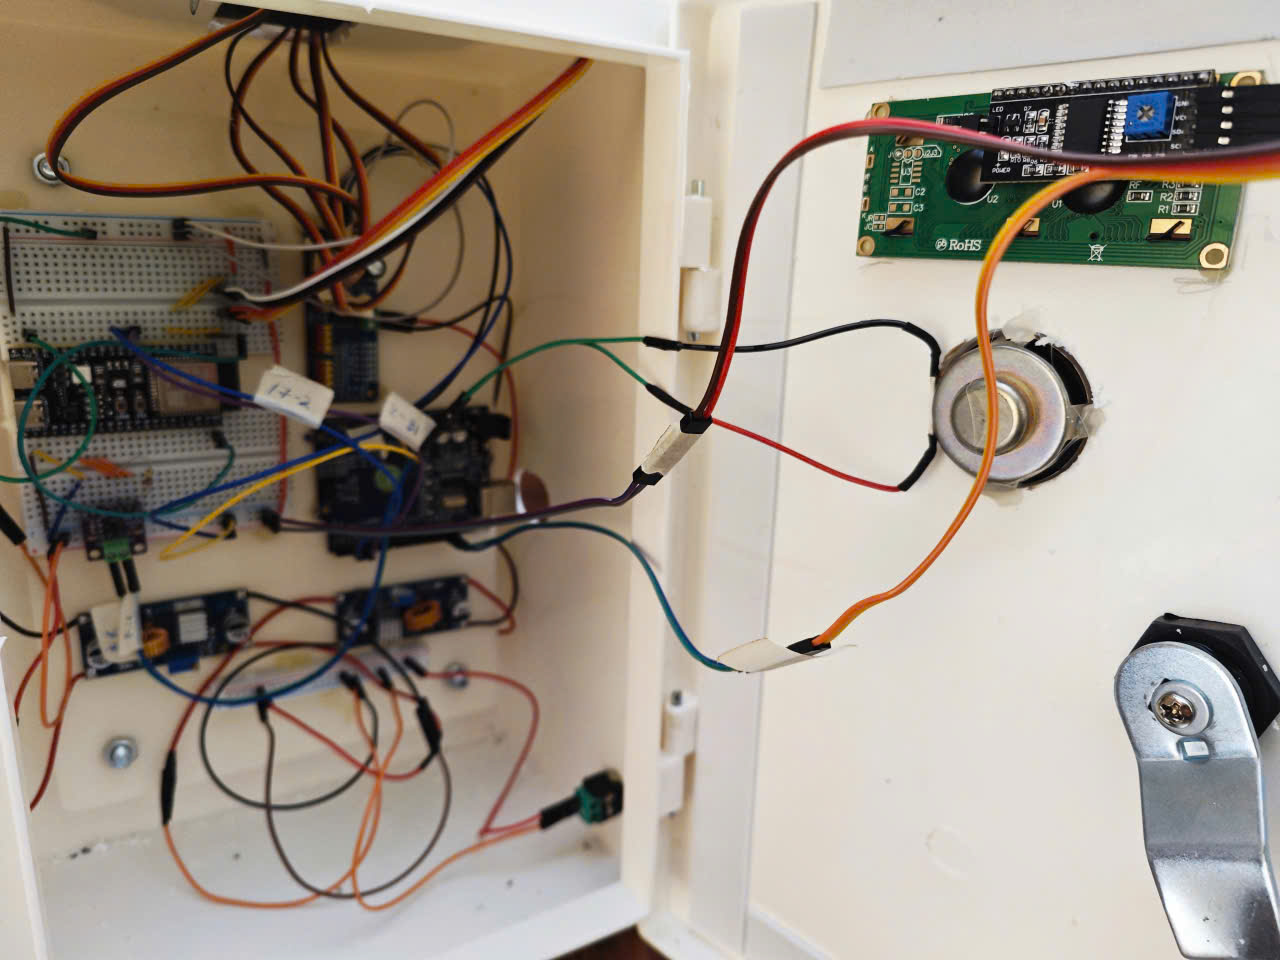
Unarranged wiring (left) and corresponding wiring inside the electrical box (right).
Schematics

Schematics for wiring.
Code
Please checkout code in the repository for this project.